
Review Of Add Fonts To Macbook References
Review Of Add Fonts To Macbook References. Open the “finder” on your mac and find the folder with the downloaded font. Open finder or spotlight 2.
Web click download on the pop up. This is usually located in the “downloads” folder. Web to add new fonts, click on the 'add' button in the font book toolbar, then locate and select a font.
Web Add Fonts To Word On Mac Install The Default Font For Word To Save Time Each Time You Use Word.
Web on the mac you use the font book to add the font and then copy it to the windows office compatible folder. Click downlaod, and the click download again on the pop up. Search for font book and launch it 3.
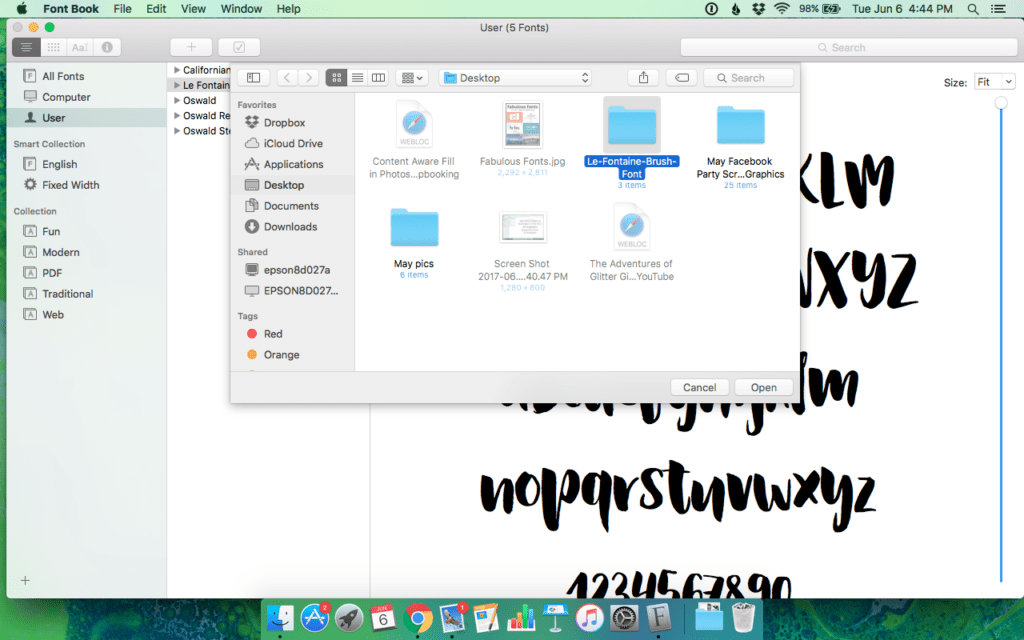
Open Font Book On Your Mac In The App, Select The ‘Plus’ Icon On The Top.
Once you’ve found your font, download it to a folder or your desktop. Open format > font > select font, font size, color > click. In the finder, open a new finder window.
Click Go In Your Mac’s Menu Bar, Then Click Applications.
Open the “finder” on your mac and find the folder with the downloaded font. Drag the font file to. Web to add new fonts, click on the 'add' button in the font book toolbar, then locate and select a font.
To Add Fonts You Can Do So Via Font Book And They Will Show Up In Preview And Other Applications.
This is usually located in the “downloads” folder. Adding fonts to figma mac can be done through the following process: Web in the font book app on your mac, choose file > new library.
In The Applications Window, Select Font Book — Its Icon Is A Book With A Big F On It.
At the top corner, click on the app. You can also drag new fonts directly into the font. Installing a font on macos: